

Step 1: Turn one bucket upside down (the bottom of this bucket will fit inside the 2nd bucket) then using the yogurt cup (also upside down) mark the outline of the cup on the center of the bucket bottom. Using a saber saw cut a hole in the bucket bottom so the cup will fit snugly but not fall through the bottom.
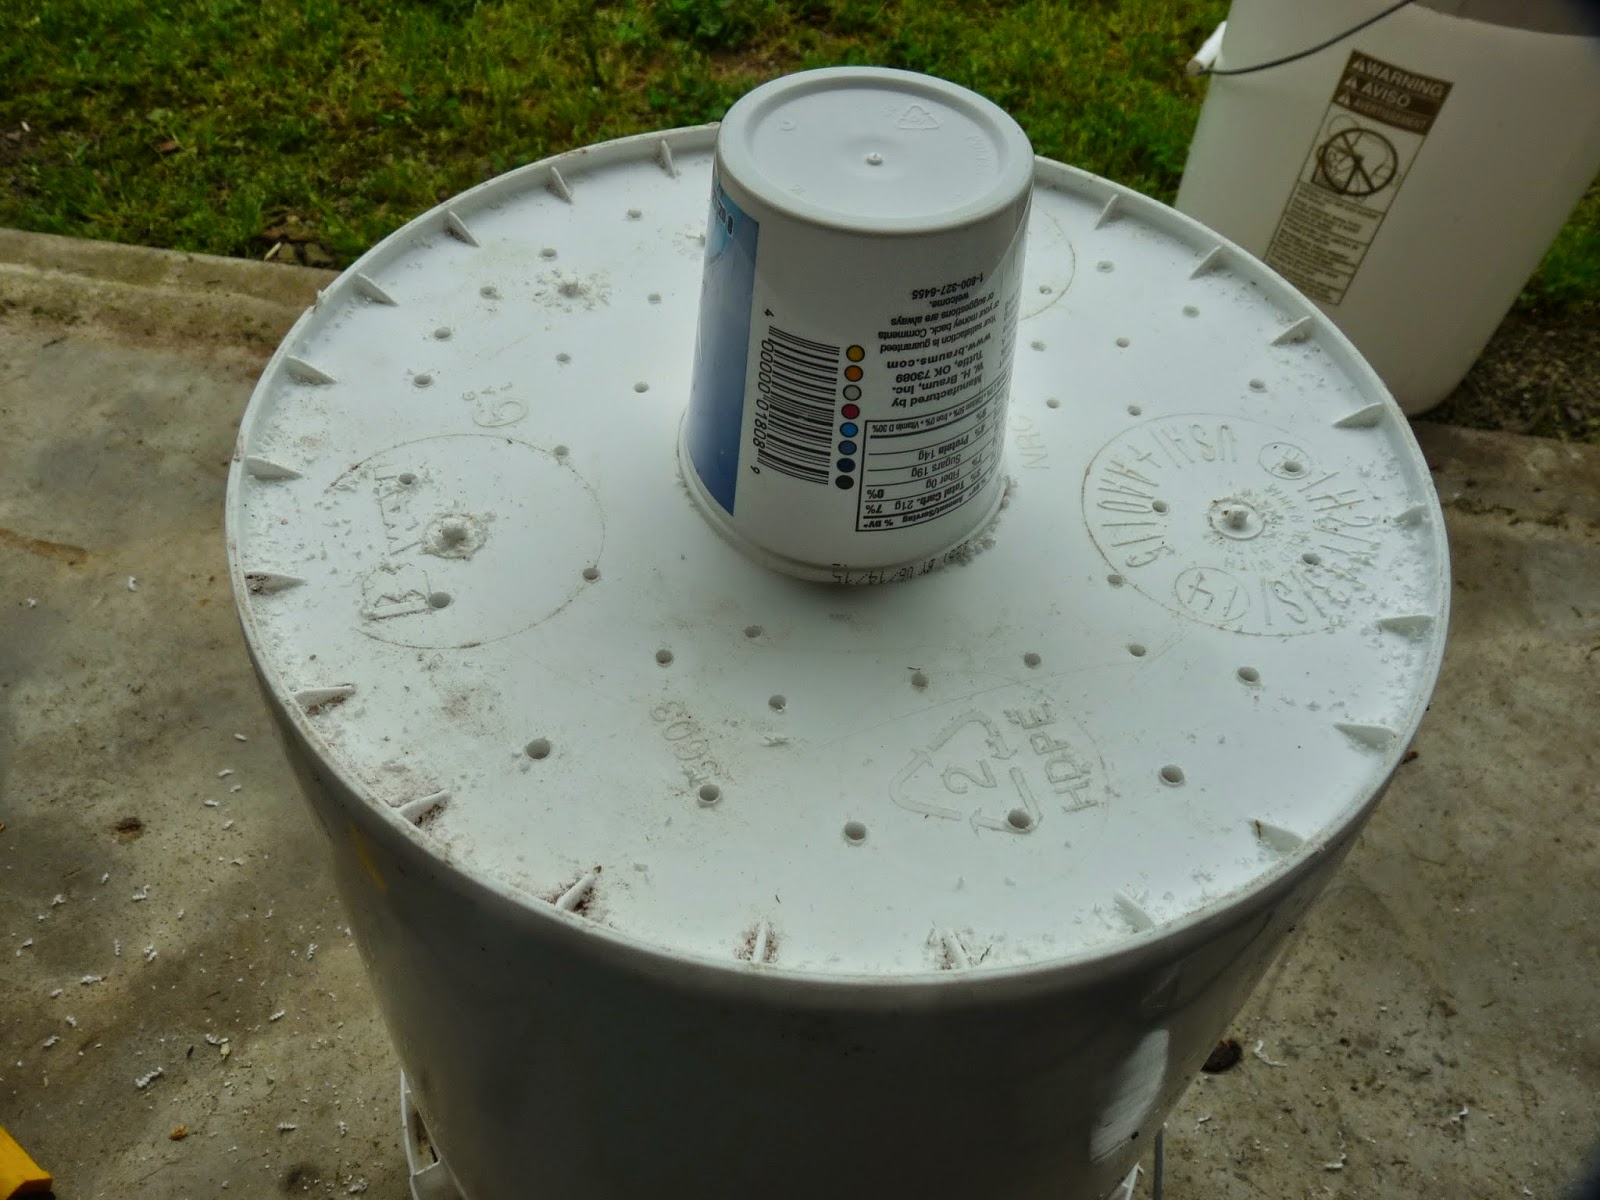

Step 2: Drill multiple holes in the bottom of the bucket around the large hole in the center. These holes will help drain excess water into the bottom of the second bucket.
Step 3: Measure 4" up from the bottom of the bucket, mark in several points around the side of the bucket and cut the bottom off with the saber saw. This section from bucket 1 will slip inside bucket 2 and keep the soil 4 inches above the bottom of bucket 2.

Step 4: Drill many holes in the sides of the yogurt cup. This will allow the water in the bottom of the bucket (lower chamber) to wick into the upper chamber where the soil and plant roots are.


Step 5: With the insert (made from bucket one) in place inside bucket two, hold the bucket up to the light and mark the bucket just below the bottom line of the insert. Drill 5-6 1/4inch holes in the side of the bucket. This provides drainage of excess water.

Step 6: Line the yogurt cup with a paper coffee filter then fill and compact paper lined cup with potting soil.

Step 7: I cut a liner made of landscape material to place in the bottom of the insert to keep soil from passing through the drain holes. Cut an x in the middle of this cloth so the yogurt cup will fit through the cloth.
No comments:
Post a Comment